
Published Jun 3, 2021
The Starships of the Dominion War
"Let’s break down the starship classes that the Klingons, Romulans, Dominion, Cardassians, and Breen brought to the fight."

StarTrek.com
A two-year period of open hostilities that ravaged the Alpha Quadrant, the Dominion War saw the Federation Alliance (United Federation of Planets, Klingon Empire, Romulan Star Empire) attempt to hold off the combined forces of the Dominion, Cardassian Union, and Breen Confederacy. Last year, I explored the vessels that made up the bulk of the Federation’s 24th century fleet, but what about the armadas fielded by the other major powers involved in the Dominion War? Let’s break down the starship classes that the Klingons, Romulans, Dominion, Cardassians, and Breen brought to the fight.
12. The Bajoran Fleet
StarTrek.com
Before we dive into the larger factions, we need to acknowledge the small-yet-courageous Bajoran flotilla that established a blockade around Derna. While the Romulans and Bajorans fought for the same side, the Bajoran Provisional Government objected to the installation of plasma torpedoes at a Romulan hospital on the moon’s surface. Led by Colonel Kira aboard an interceptor, the Bajoran Militia won the standoff without firing a shot when it proved able to convince Starfleet’s Admiral Ross that they would not allow an armed Romulan base in their star system.
11. Klingon Bird-of-Prey
StarTrek.com
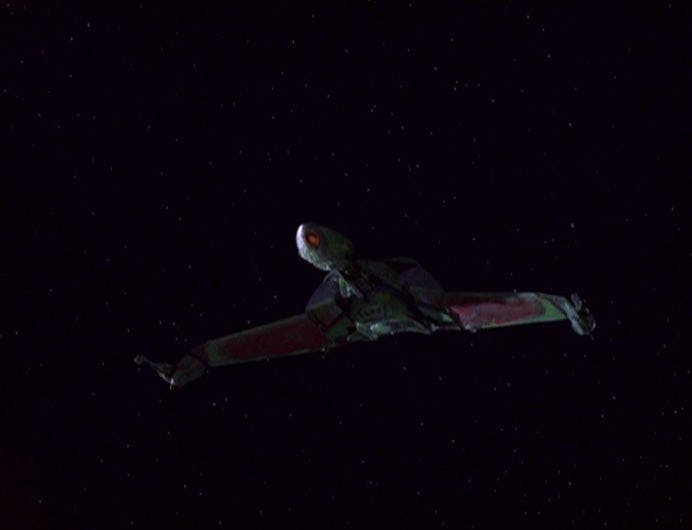
The backbone of the Klingon Empire’s might, the Bird-of-Prey and its variants could be spotted in almost every large-scale battle against the Dominion. General Martok’s flagship, the I.K.S. Rotarran, stood by the U.S.S. Defiant during the Second Battle of Deep Space 9, the engagement that acted as the war’s opening salvo. The Rotarran proudly served throughout the rest of the conflict. Martok also enlisted five agile Birds-of-Prey to participate in his cavalry-like raid behind Dominion lines in “Once More Unto the Breach.” Sturdy and reliable, many Birds-of-Prey were nonetheless lost during the increasingly brutal clashes with the Dominion.
10. Klingon Vor’cha-class
StarTrek.com
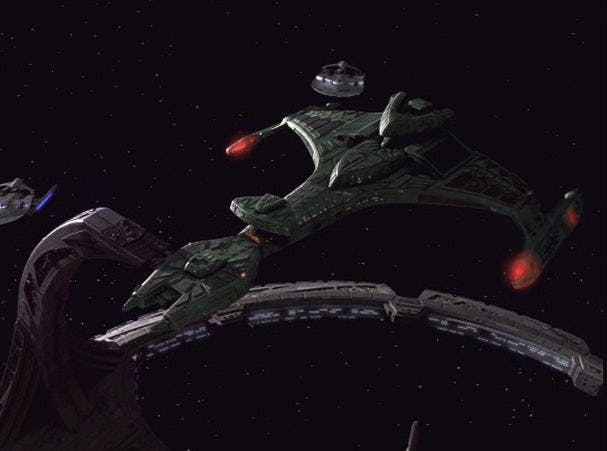
Originally designed to transport the Klingon chancellor, the Vor’cha-class cruiser soon became another regular staple in the Empire’s fleet. With the Dominion in control of Deep Space 9 and Starfleet outnumbered almost two-to-one, Operation Return seemed as if it might turn into a significant Federation defeat… until a wave of Vor’chas arrived to break the Dominion lines and allow the Defiant to continue on its mission to retake the former Cardassian mining station. Following this victory, these cruisers often patrolled near the Federation starbase. Perhaps most importantly, these ships participated in the Federation Alliance’s invasion of Dominion-controlled territory, including the Chin’toka and Cardassian systems.
9. Klingon K’t’inga-class
StarTrek.com
Prior to the Dominion War, the Jem’Hadar disabled the K’t’inga-class I.K.S. B’Moth and tried luring the Rotarran into a trap, but Martok managed to outwit his foes and rescue the surviving crew members. An older design, the K’t’inga-class still stood as a capable warship in the late 24th century and was assigned to the fleet that destroyed the Dominion shipyards at Torros III during the Second Battle of Deep Space 9. Much like the more modern Vor’cha-class, these cruisers also engaged the enemy as the Federation Alliance advanced on Chin’toka and surrounded Cardassia Prime in the final days of the conflict.
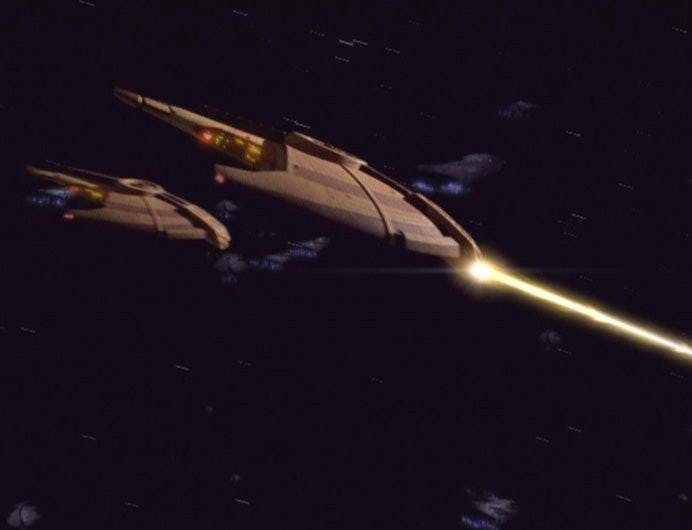
8. Romulan Shuttle
StarTrek.com
This small ship played a substantial role in the war, as it brought Senator Vreenak to his clandestine meeting with Captain Sisko. The fraudulent evidence produced by Deep Space 9’s commanding officer failed to convince the Romulan that the Dominion was planning to attack the Star Empire, but unbeknownst to Sisko, Elim Garak planted an explosive device aboard the shuttle. The resulting detonation killed the senator on his way back to Romulus, leaving the Romulan Senate with the notion that the Dominion had orchestrated Vreenak’s murder. This belief prompted Romulus’s entry into the war, a pivotal movement that gave the Federation and Klingon forces a powerful new ally.
7. Romulan D’deridex-class

StarTrek.com
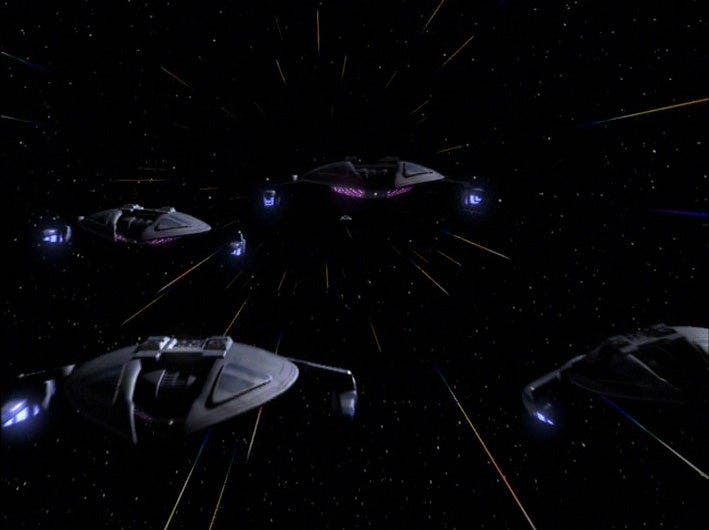
A Tal Shiar task force consisting of five of these massive warbirds collaborated with an Obsidian Order fleet in an attempt to wipe out the Founders prior to the war, but the Dominion had infiltrated their unit and eradicated the intelligence service vessels. As with other Romulan starships and their Klingon counterparts, the D’deridex-class had the ability to cloak itself, although the tactic was not always successful against the Dominion’s advanced sensors. The warbirds guarded key assets, including Deep Space 9 and Romulus itself. The Romulan convoy that attempted to run the Bajoran blockade at Derna was made up of D’deridex-class vessels. While bloodshed was avoided on that mission, many other warbirds were wiped out during the march on Chin’toka and Cardassia.
6. Cardassian Galor-class
StarTrek.com
First seen in The Next Generation, the Cardassian Galor-class warships served alongside their Dominion allies during the attack on Deep Space 9. Numerous vessels were stationed at the starbase while it was occupied by the Dominion, and many others confronted the Federation fleet when it recaptured DS9 during Operation Return. Following that defeat, Galor-class ships were seen patrolling close to Dominion facilities. The Cardassians initially held the line with the Dominion and Breen vessels during the Federation Alliance’s invasion of their home territory. However, inspired by Damar’s rebellion, the Galor-class warships switched sides mid-battle and joined up with the combined Federation, Klingon, and Romulan armada at the Battle of Cardassia.
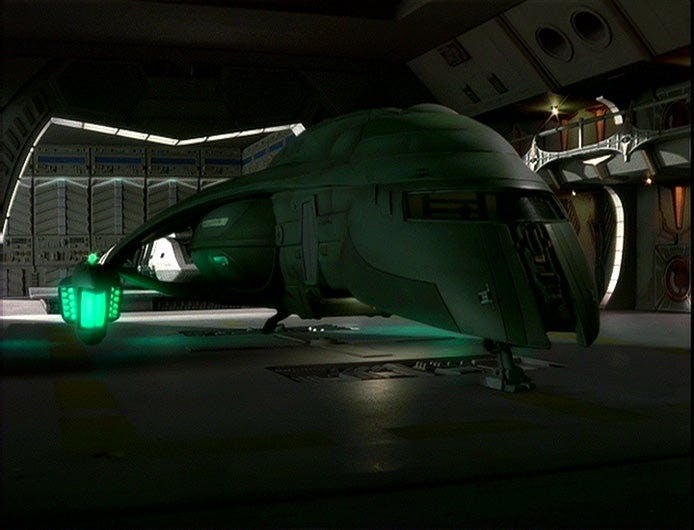
5. Cardassian Hideki-class
StarTrek.com
Smaller than their Galor-class relatives, these Cardassian patrol ships supported the Dominion forces in both victory (Second Battle of Deep Space 9) and defeat (Operation Return and the Battle of Cardassia). The class’s most prominent contribution to the war effort actually came in service to the Cardassian Liberation Front, as a shuttle variant was procured by the resistance movement and used to take Colonel Kira, Odo, Damar, and Garak to a Dominion repair facility. While there, the group stole an experimental Jem’Hadar fighter that became vital to finding a way to counteract the Breen’s energy dampening weapon.
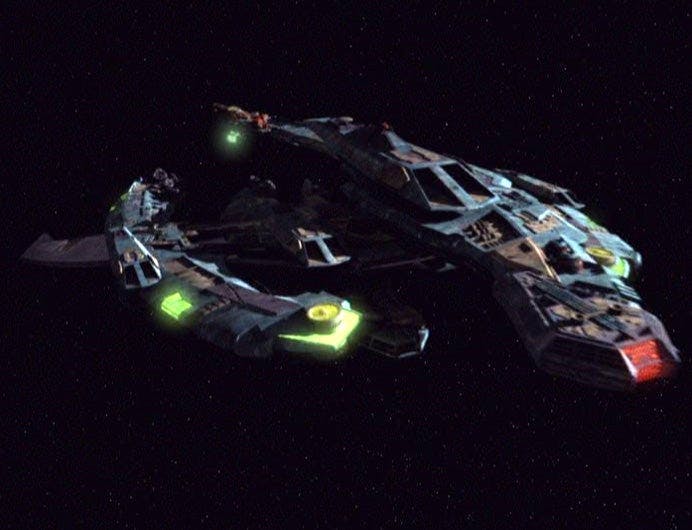
4. Breen Warship
StarTrek.com
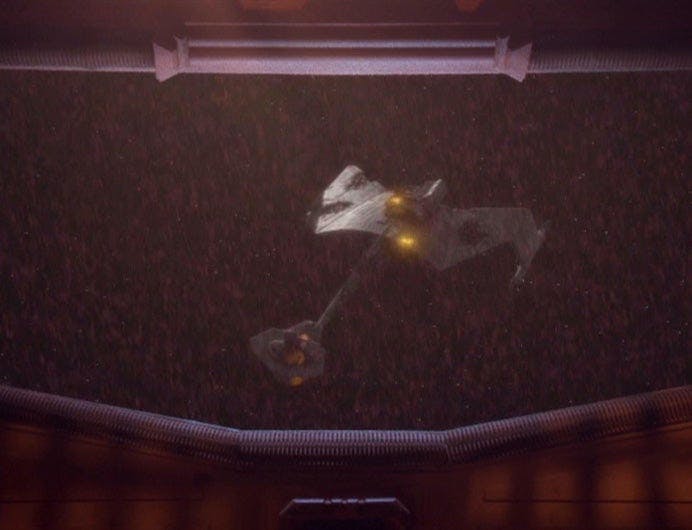
Speaking of the mysterious Breen, their species entered into the Dominion War in its final stages and made an immediate impact. A Breen vessel captured Worf and Ezri Dax as a gift for the Female Changeling, but even more importantly, their warships were equipped with the aforementioned energy dampening weapon. When deployed against the Dominion’s foes at the Second Battle of Chin’toka, this weapon disabled key systems on nearly all of the ships in the Federation Alliance fleet, laying the foundation for an overwhelming Dominion win. The Alliance managed to develop a way to neutralize this weapon’s effect on their starships, yet the Breen continued to pose a threat up to and including the Battle of Cardassia.
3. Jem’Hadar Fighter
StarTrek.com
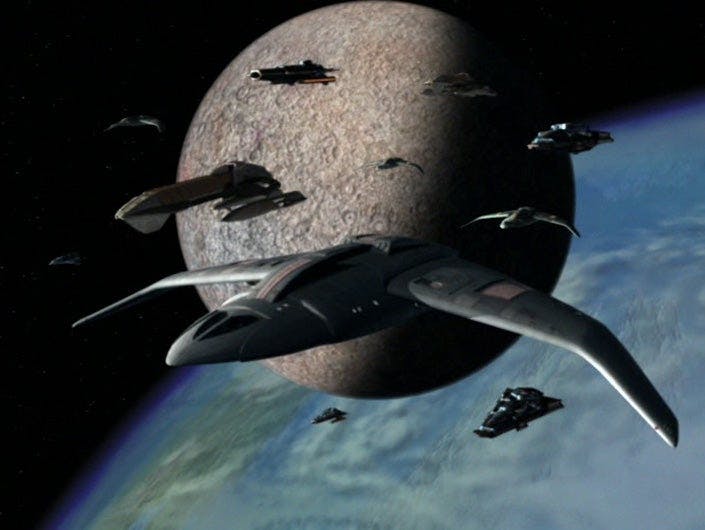
The Dominion fighters made a name for themselves in the Alpha Quadrant when three ships took down the Galaxy-class U.S.S. Odyssey, and their bug-like profiles plagued the Federation in every encounter. The large influx of these vessels that came through the Bajoran wormhole convinced Starfleet Command to mine the aperture, an action that resulted in the Dominion’s decision to fully ignite hostilities with the Federation. Swarms of these fighters were built to control the Dominion’s ever-expanding foothold in local space, and they wreaked havoc on enemy craft in battle after battle. Captured prior to the war, one Jem’Hadar fighter was used by Captain Sisko to eliminate a ketracel-white resupply depot in an effort to create a shortage of the drug.
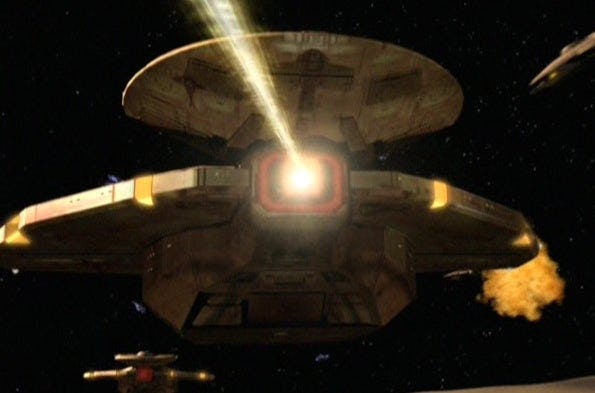
2. Dominion Battle Cruiser
StarTrek.com
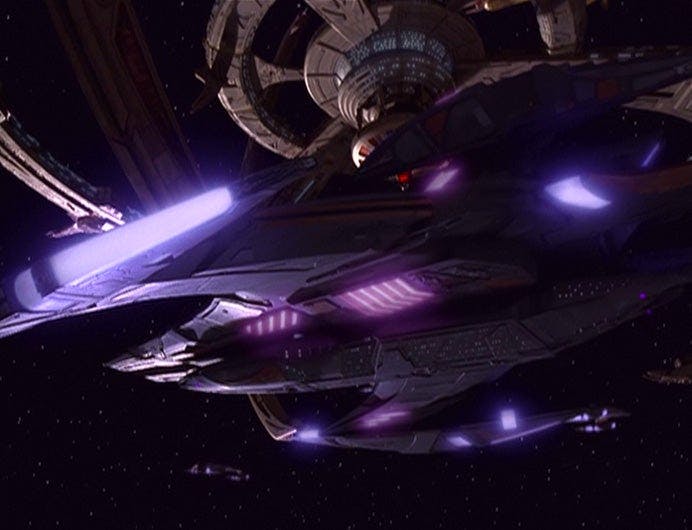
These capital ships led the Dominion and Cardassian fleet in triumph at the Second Battle of Deep Space 9, but they did not succeed in holding the station for very long. Despite a numerical advantage, these ships could not prevent the Defiant from getting through their lines during the chaos of Operation Return. The Federation ship arrived at DS9 alone and entered the wormhole, only to discover thousands of Dominion battle cruisers and fighters on their way to the Alpha Quadrant. Fortunately, there was an intervention undertaken by the wormhole aliens, who transported the entire armada to an unknown destination, preventing these reinforcements from joining the war and tipping the scales even further in the Dominion’s favor.
1. Dominion Battleship
StarTrek.com
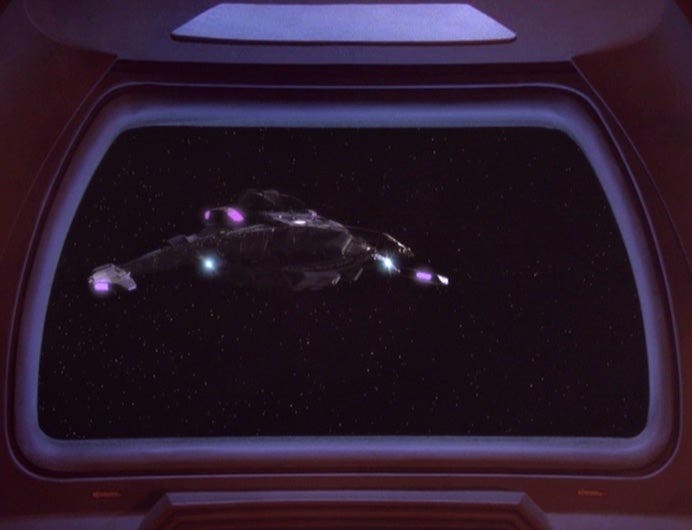
Originally detected by the Defiant-class U.S.S. Valiant, the gargantuan Dominion battleship was three times as powerful as a Galaxy-class explorer. The Valiant’s young crew of Red Squad cadets thought they had found a weakness that would permit them to vanquish the battleship, a fatal mistake that ended up killing almost all of the Valiant’s complement. The Dominion demonstrated its formidable construction skills and produced even more battleships, entering them into regular service by the Battle of Cardassia. These vessels were last seen orbiting Cardassia Prime, preparing to defend the planet from the Federation Alliance and fight to the very last Jem’Hadar soldier.
Jay Stobie (he/him) is a freelance writer who has contributed articles to the Star Trek website and Star Trek Magazine, as well as to Star Wars Insider and the Star Wars website. Jay has appeared as a guest on Engage: The Official Star Trek Podcast, and his work has been featured on the Star Trek and Star Wars YouTube channels. Jay also serves as a remote assistant and consultant advising many actors and creatives who work on notable sci-fi productions. Jay can be found on Twitter and Instagram at @StobiesGalaxy.