
Published Dec 15, 2022
Holodeck the Halls with a Starfleet-Inspired Craft
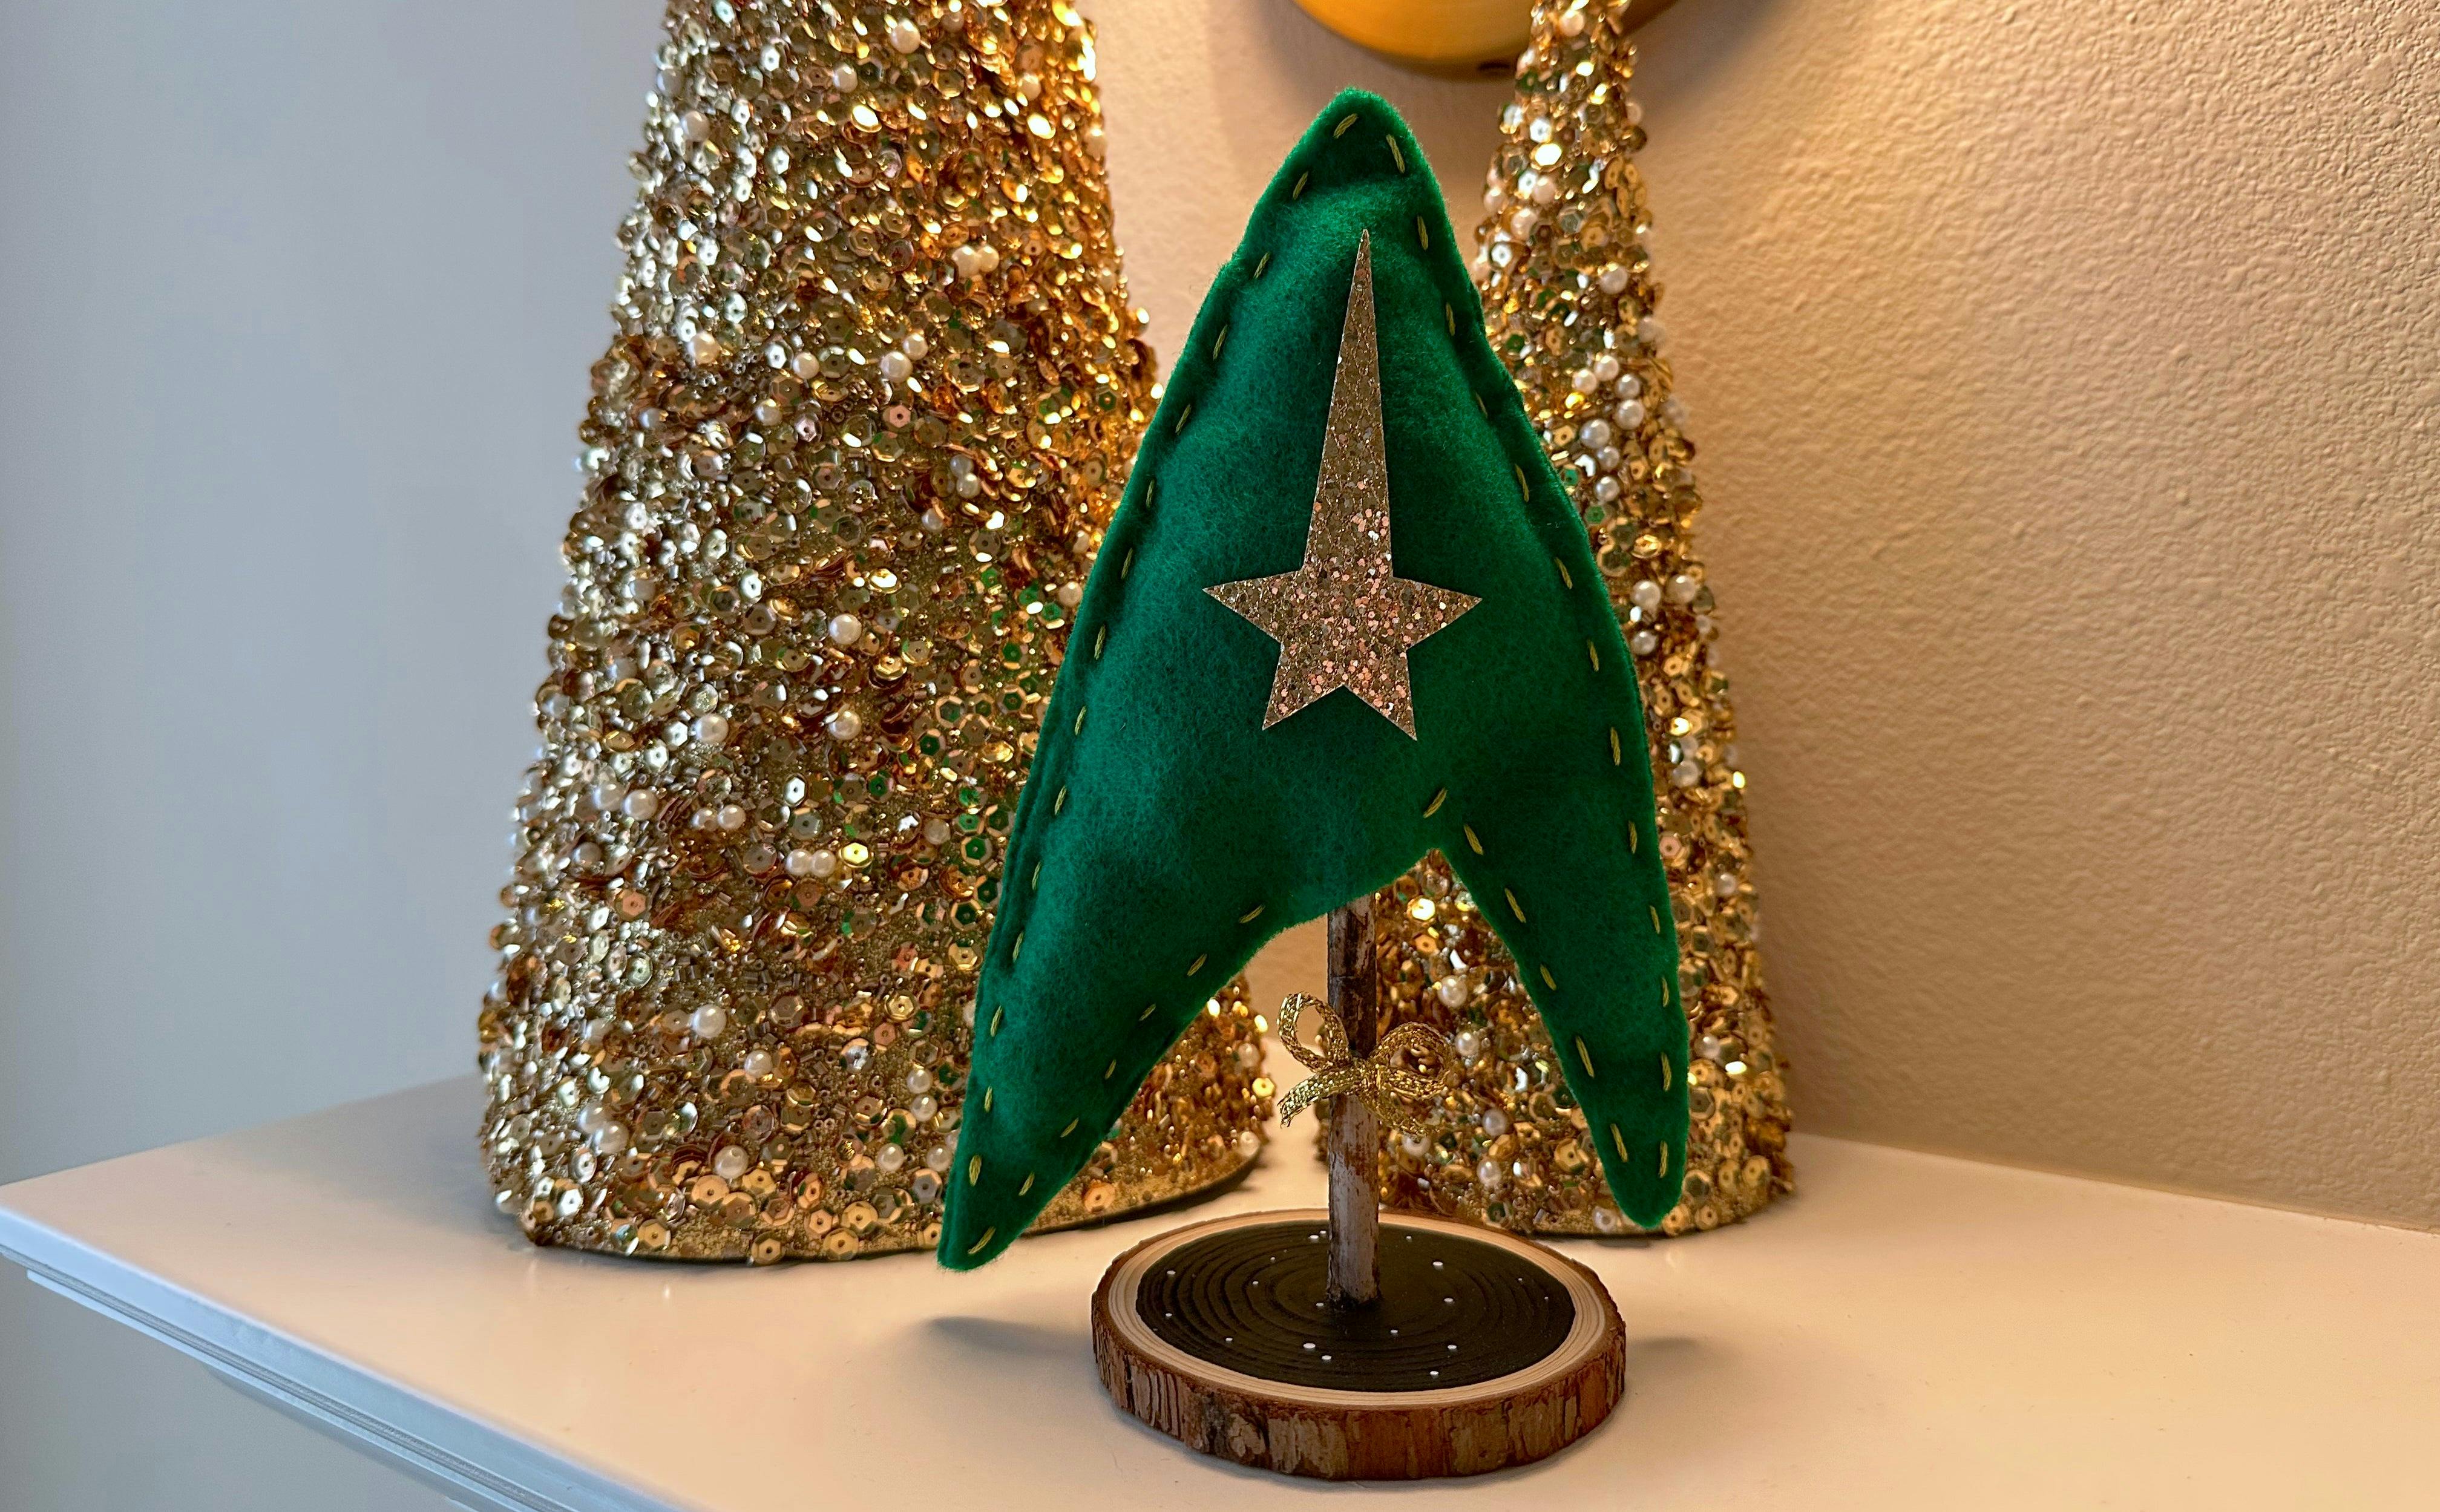
Add a little Star Trek cheer to your holiday décor this year!

StarTrek.com / Rob DeHart
Everyone’s assortment of holiday decorations is unique. The colorful trinkets and treasures you’ve gathered over the years shed a little light on your household’s one-of-a-kind personality.
You see that empty spot between your favorite ribbons, candles, and lights? It’s the perfect place for a subtle nod to one of your favorite shows — Star Trek!
Here’s the how-to to make your very own evergreen, festive Starfleet insignia stand!
StarTrek.com/Kelly Knox
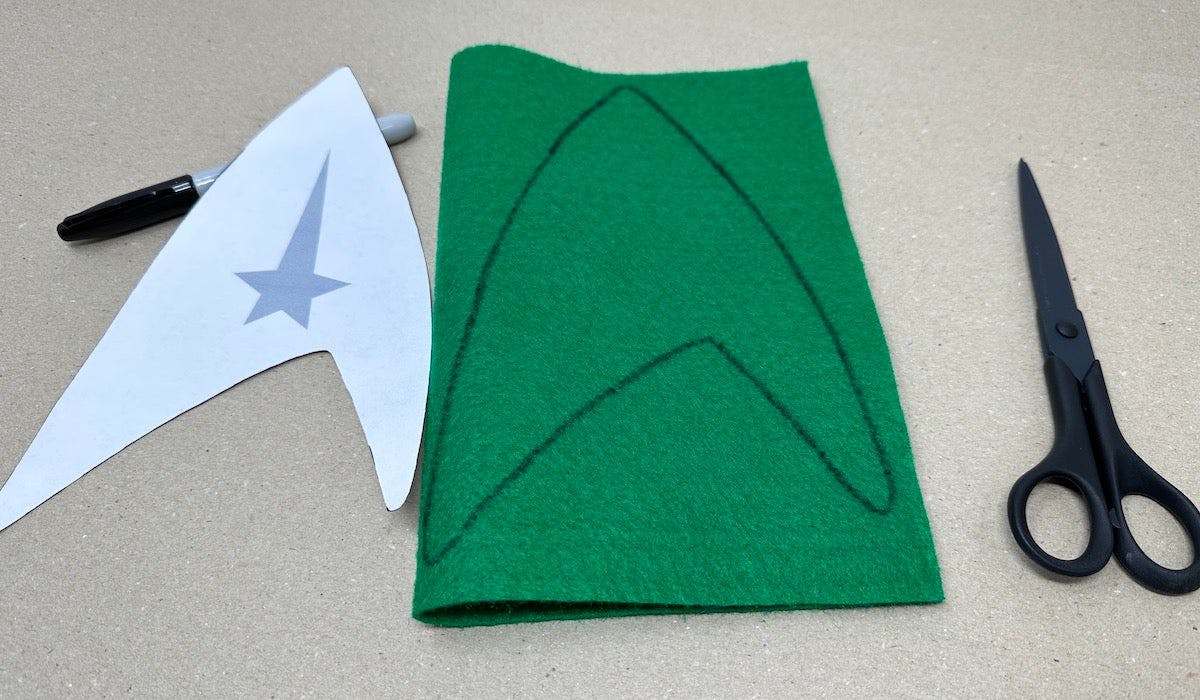
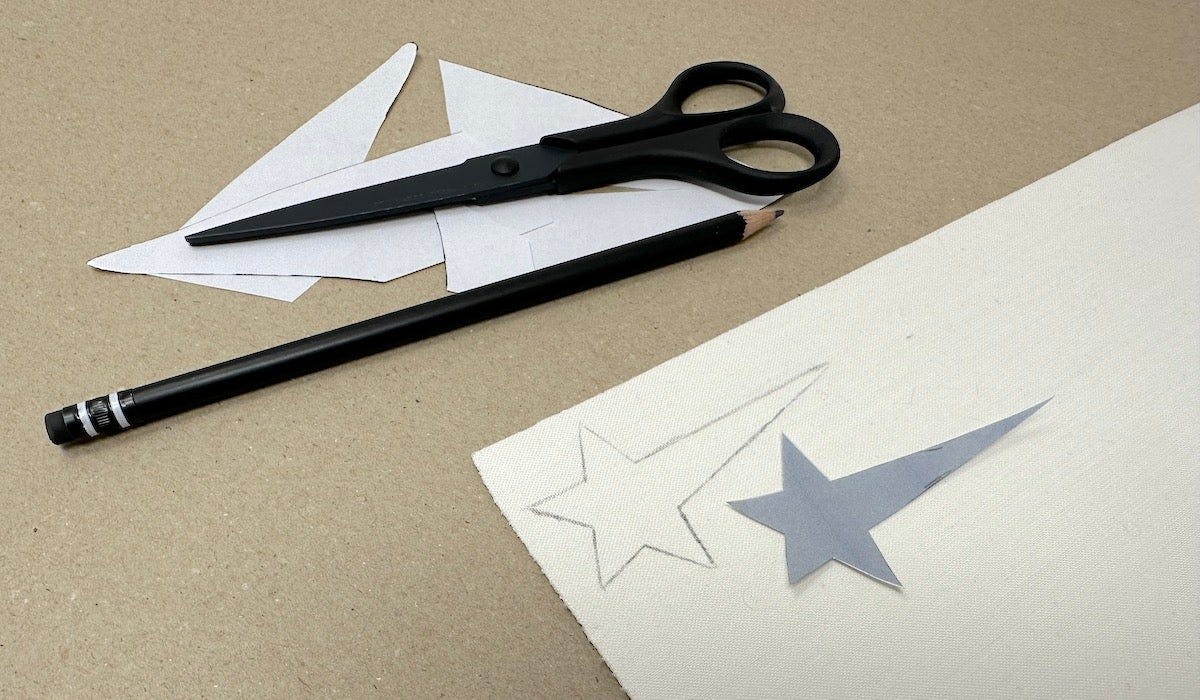
Step 1: Print and cut out the gray shape on the insignia template.
Step 2: Fold the green felt sheet in half. Trace the template with the black marker on the felt and cut it out.Don’t discard the leftover felt pieces or the template you traced yet!
StarTrek.com/Kelly Knox
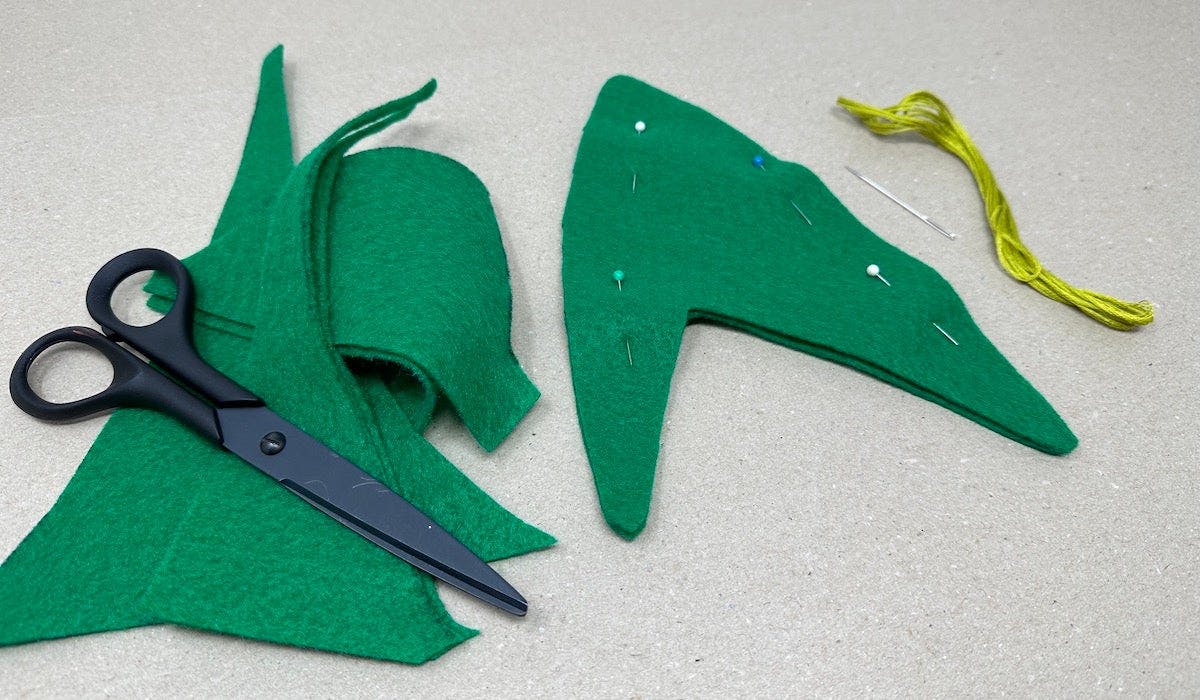
Step 3: Flip the piece with the black marker lines to the inside and flip the other felt piece to patch. Pin the two pieces together.
Step 4: Sew the two pieces together along the edge, leaving a 1” gap open at the bottom center.
StarTrek.com/Kelly Knox
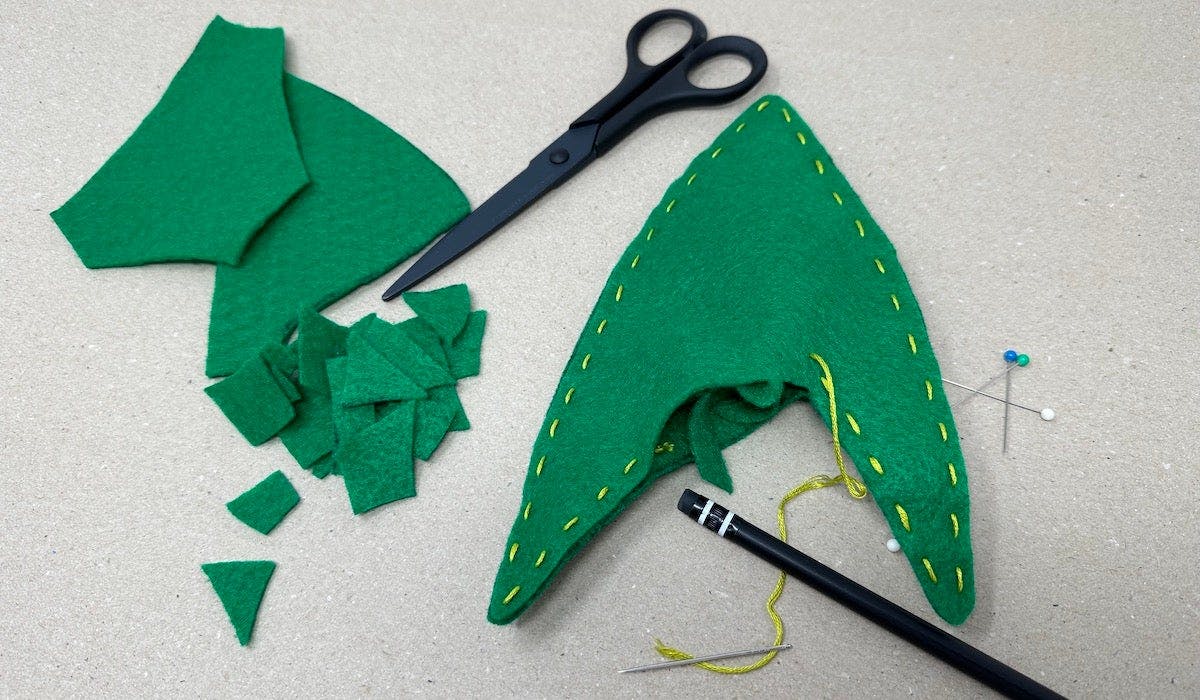
Step 5: Next, cut the leftover felt into small pieces. Stuff the small pieces into the insignia through the gap, using the eraser end of a pencil to gently push the pieces into the corners.
Tip: You can use batting or stuffing for this step if you prefer.
StarTrek.com/Kelly Knox
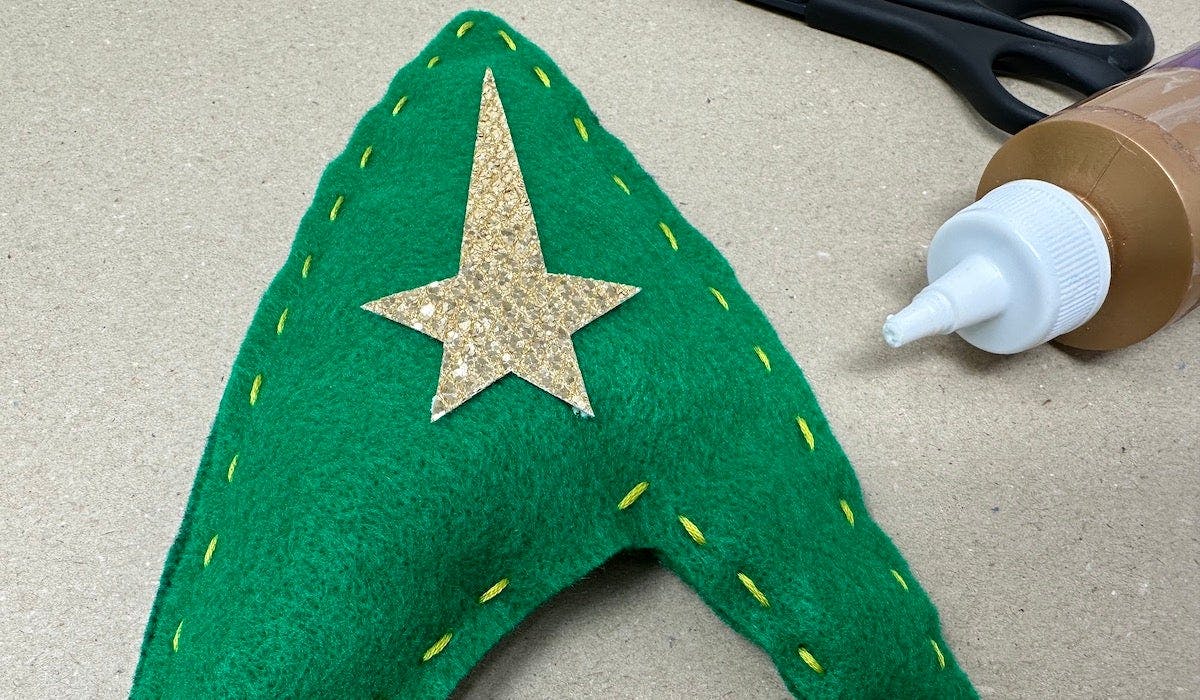
Step 6: Cut out the star shape from the template. Use the pencil or marker to trace it on the back of the metallic gold felt. Cut the star out.
StarTrek.com/Kelly Knox
Step 7: Glue the gold star in the center of the front side of the insignia. Set aside to cool or dry.
StarTrek.com/Kelly Knox
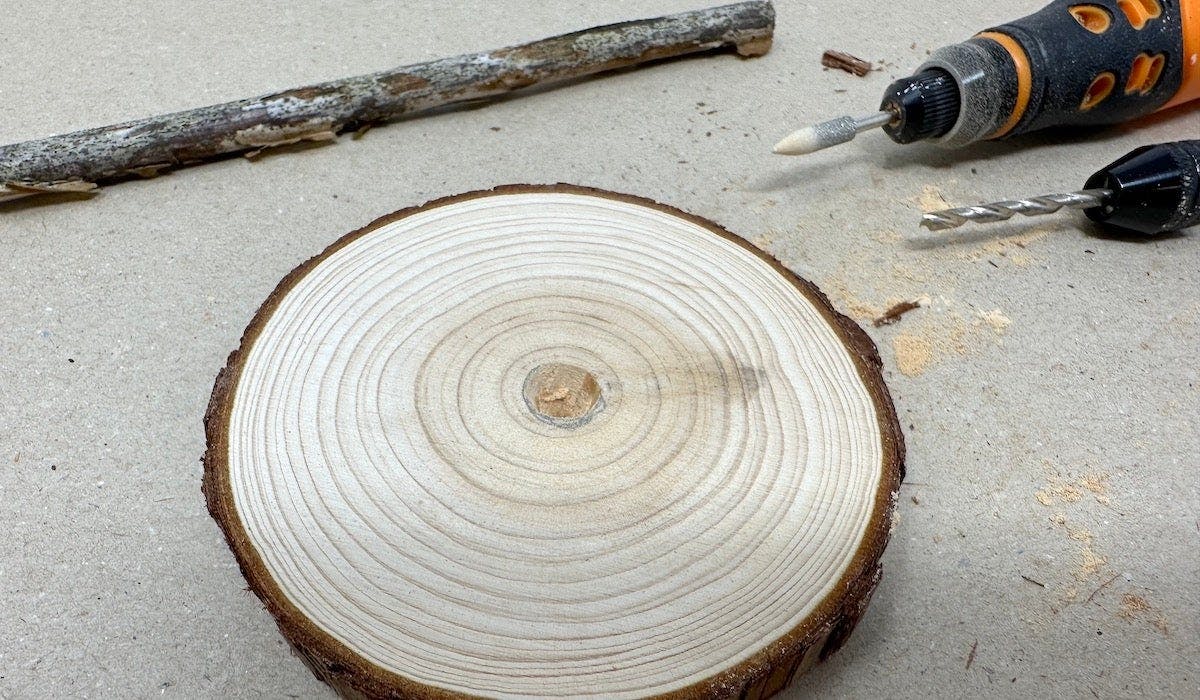
Step 8: Trace one end of the stick in the center of the wood slice.
Step 9: Make a hole with the pin vise hand drill in the center of the circle you traced, making sure it doesn’t go all the way through the wood.
Step 10: Use the rotary tool to widen the hole you made until you reach the edges of the traced circle.
StarTrek.com/Kelly Knox
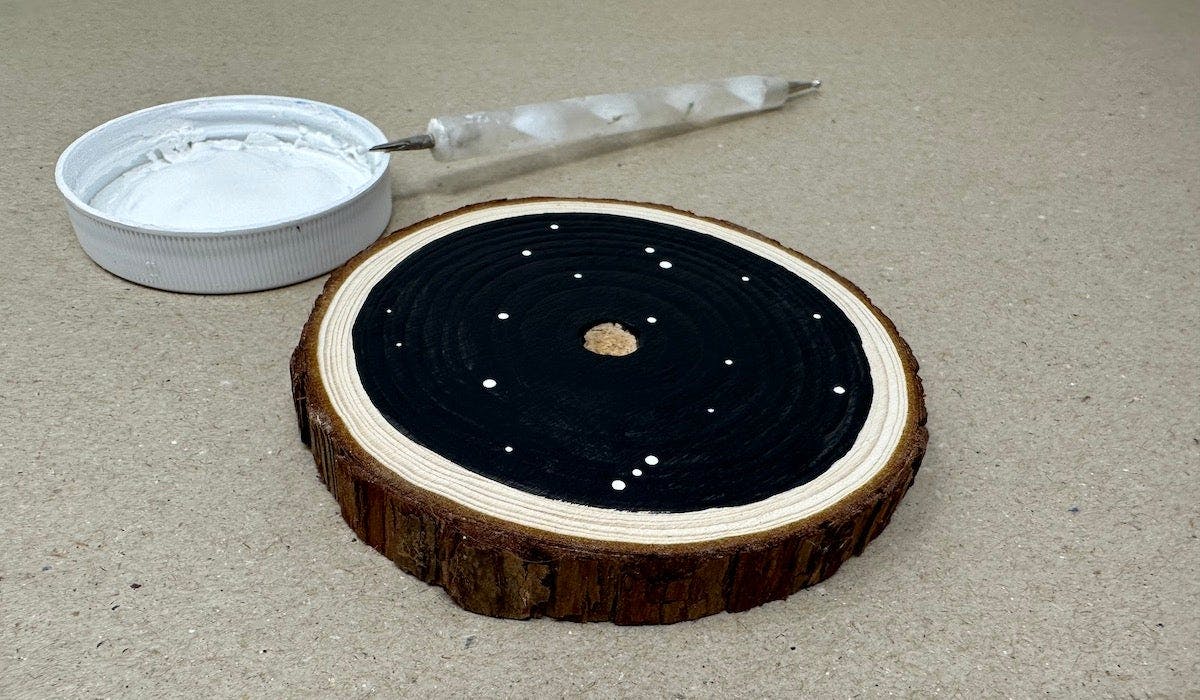
Step 11: Paint a large circle with the black paint on the wood slice, leaving the inside of the hole unpainted. Let dry.
Step 12: Use the hard end of a paint brush or a dotting tool with the white paint to make stars. Let dry.
StarTrek.com/Kelly Knox
Step 13: Glue the stick into the hole you made. Let the glue dry, if applicable.

StarTrek.com/Kelly Knox
Step 14: Gently slide the felt insignia onto the stick through the gap you left.
Step 15: Tie the gold ribbon into a bow around the stick, or tie it into a bow and glue it to the stick, whichever works best for the ribbon you selected.
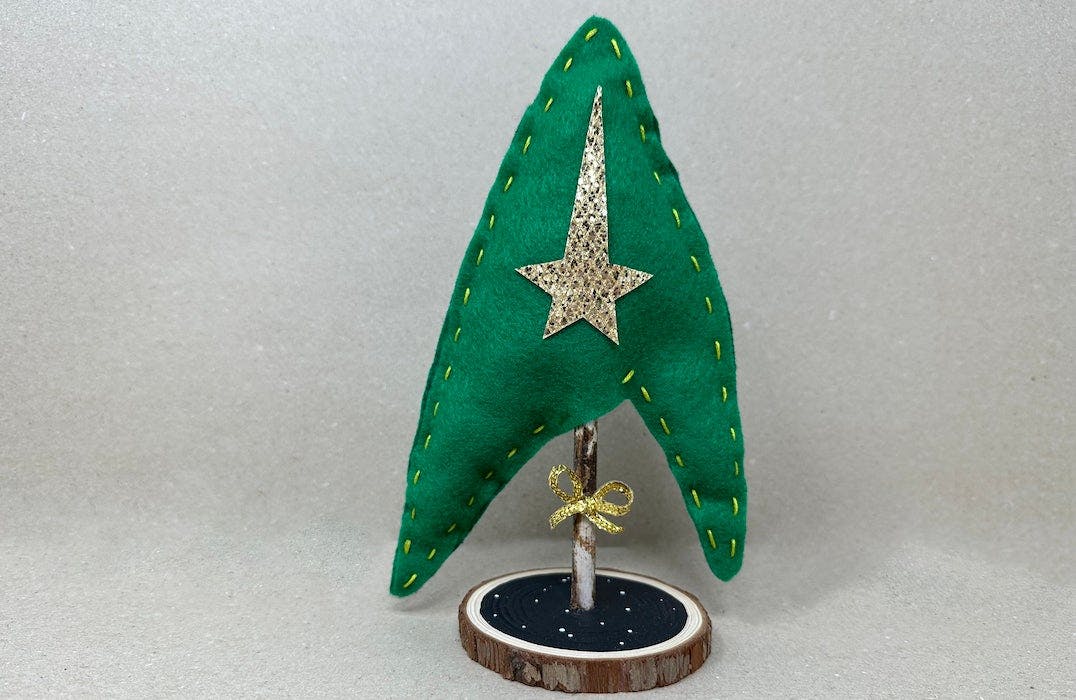
Your little Star Trek delta tree is done! Leave it on display after the holidays to boldly go into the new year and beyond.
StarTrek.com/Kelly Knox